For context on this blog documenting our foray into silvopasture, you may wish to read my first blog which charts how we got to this point. But if you’re looking for a digested read: trees are great, and animals like trees – but is there a tree guard in existence which can survive goats? We plan to find out.
Having determined on a grid pattern of tree planting in Plum Plot, we were keen to use the opportunity to trial different tree guards late in the tree planting season, so we got cracking.
Sourcing the trees
The ever helpful Woodland Trust agreed to fund our 12 standing trees and I decided to shelve the 12 willow until later (in deference to another random idea which needs prototyping). However they were unable to lay hands on a red mulberry so we opted for black instead. Nor were they able to locate a black locust.
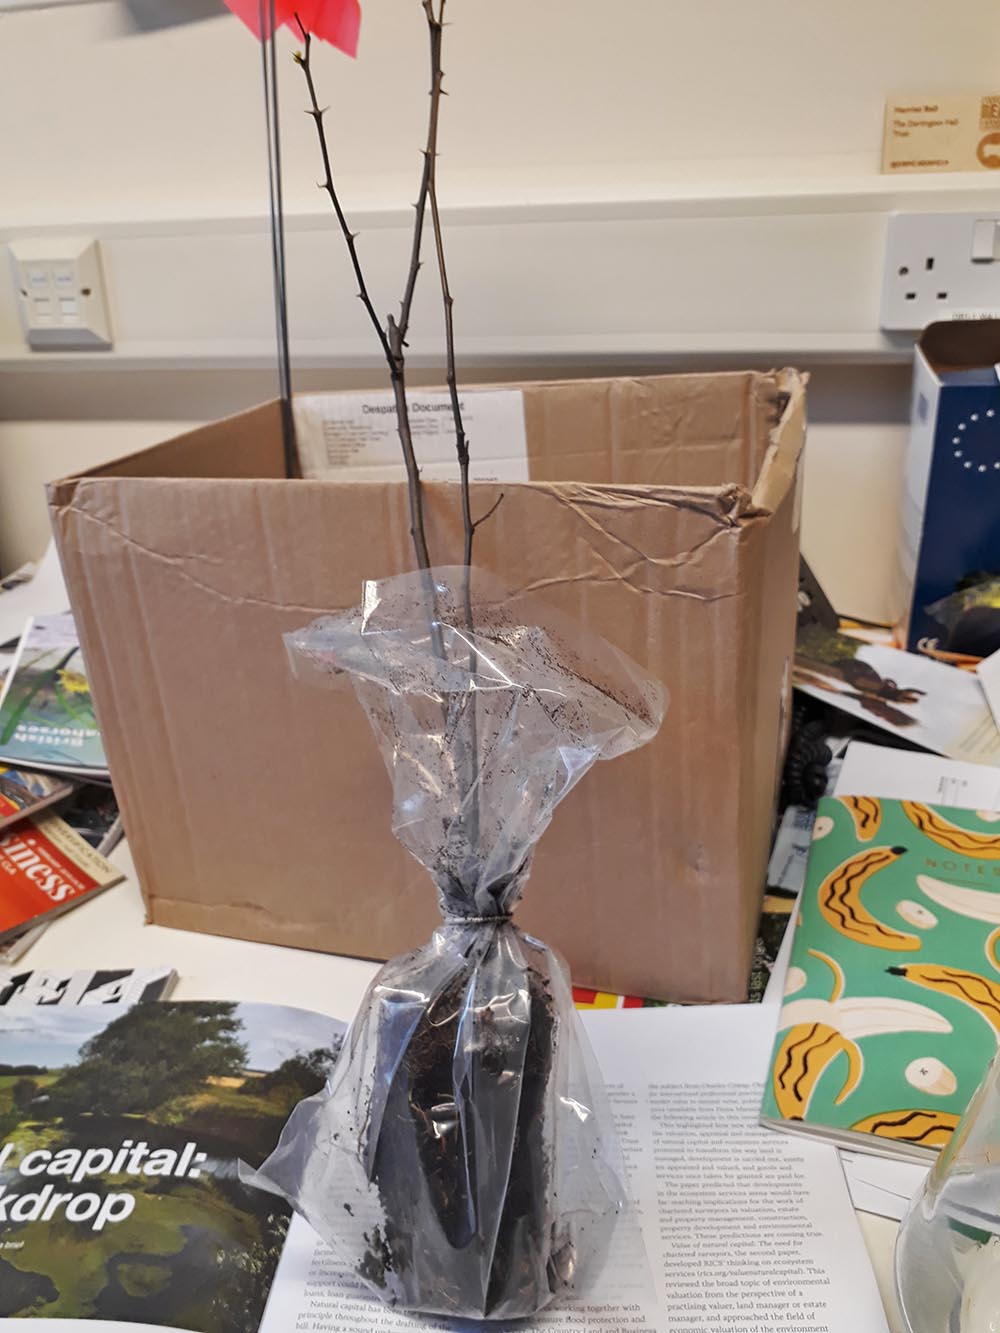
Locating a black locust proved generally quite difficult. Lots of local nurseries had different cultivars, geared more towards domestic gardeners with a fondness for bright flowers. Of the bog standard variety I could only find some quite expensive trees. With a restricted budget I turned instead to the internet and took a punt on two, equally dodgy looking, websites offering black locusts at 15 euros each. One appeared in reasonable time and, due to the slight discrepancy between the arrival of the tree and the arrival of the tree guard, occupied my desk for a couple of weeks.
As previously mentioned, I am no tree expert – but as it was sat on my desk I had plenty of opportunity to observe it, noticing one day a grey scab-like feature which looked a little too soft to be tree. Prodding with a paperclip caused it to detach revealing that it was indeed a separate organism resembling a cross between a slug and a woodlouse. By the time you’re having a slight freak-out because in buying trees off unknown internet sources, you may have unwittingly introduced yet another new pest to these shores, it’s a bit late to reflect on biosecurity – but I would suggest you save yourselves from a similar fate and reference the Forestry Commission advice on the subject. My fears were allayed, marginally, by Dartington tree warden, Dave, who identified the slug/woodlouse hybrid as a scale insect of which there are many native varieties. A full body scan of the tree revealed only one more and the paperclip dispatched it promptly.
Marking out the field for planting
On the subject of pests, if you’re acquainted with our previous agroforestry project, Broadlears, you may know that we used the GPS on a tractor to subsoil the tree rows which worked very well from the perspective of straight lines but appeared to create the perfect conditions for a damaging vole population boom.
As this was only 12 trees and we had no budget I thought we could skip using the tractor and just do it ourselves. As it had been easy enough to use the outside measurements of the field to plot the tree positions onto graph paper on a one metre square basis, logically I thought one could use those measurements to just transfer to tree locations into the field. Nope. It was a horrendous waste of time.
Plum Plot planting plan. Click/tap to enlarge
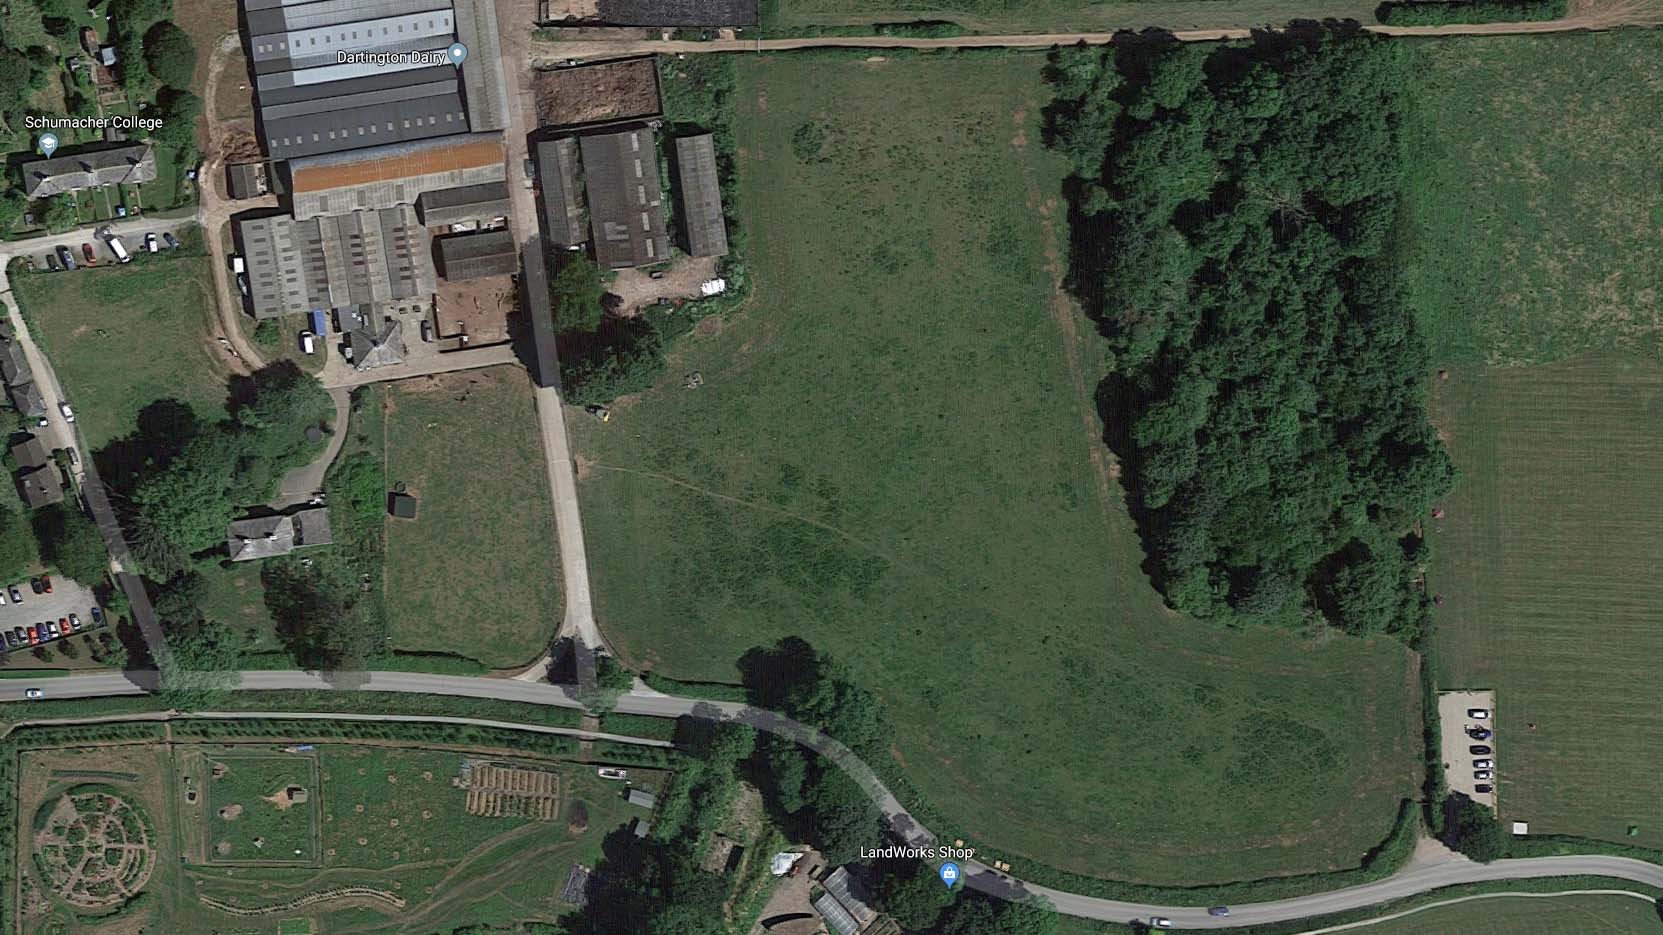
Above: Aerial photograph of Plum Plot. Image: Google Maps.
Looking for a technological fix I assumed that this kind of undertaking is where phones, GPS and apps would come into their own. I downloaded a few and had a play. I could find apps which told me where I was, apps which could keep track of my movements and give me GPS coordinates, apps with compasses to try and help direct me, apps which could give me targets and alarms for places that I might want to go and apps that could measure how far I’d been. But nothing which would help me mark out a 27m grid in a field. It’s probably out there somewhere; it may require pre-programming; but it was not within my technological capacity.
So I decided to go old school and use a measuring wheel. Only despite being one of those millennials who doesn’t drink it transpires I still can’t walk in a straight line, even with the aid of a compass. Also the distances never seemed to remain the same which, perhaps, isn’t a surprise given on rough turf there are plenty of obstacles in the way of a measuring wheel. Also, Plum Plot, the field in question, has a very varied topography so our chances of measuring out straight lines of equal distance on the ground were slim.
A rope presented itself as a way of overcoming the topography challenge and suddenly we were moving at speed. Until posts just stopped lining up and we were forced to double check our distances which revealed that the rope had been stretching out over time by several feet. Not that the posts seemed to line up that much better when we got a non-stretching rope. So, in the end, it was a combination of rope and just judging by eye. From most angles it looks like a successful grid but I wouldn’t look too closely and it’s probably entirely scuppered the notion we could narrow the rows to 12m in future, if we wished to.
Mostly it was just such a waste of time when actually we should have stuck with subsoiling, as our colleague Ella at Schumacher did, and just planted the trees themselves a little off the subsoiled row so they’d be protected from any vole-related issues.
Introducing the Hungry Games with Goats contenders
We tried to position our 12 trees around the field in locations best suited to their individual requirements. We used LiDAR data to identify wet spots for alder and Jon and Lynne’s knowledge of the field to pick out the most sheltered locations (as identified by animal movements) for the mulberries, and shoved the sycamore to the crest of the hill to face down the north wind.
Then we did our best to match trees and guards.
With 12 trees we opted to test out 6 guard types, 3 metal and 3 timber.
I don’t know if there’s a special phrase for the serendipity which occurs when you find exactly what you need by procrastinating on social media but one fortuitous day Westmorland Woodfuel appeared in my news feed announcing he’d become the UK’s first (and only) stockist of the Protector Cactus guards I’d been trying to track down. So our final lucky six guards were options F, G, H, I, J and K from our list of potentials.
To try and mitigate against palatability affecting the results we split up the alders into different guard types but we put them both into metal guards, having heard that they don’t ever really acclimatise to animals and thinking the metal would give them long term protection. The black locust and aspen were assigned to the Protector Cactus guards so that the narrow frame would enable the goats to keep their suckering tendencies in check by browsing close to the tree base. Unsure of its durability, the black mulberry went into a wide guard to make it easily replaceable and then everything else just kind of got slotted into place by roughly trying to match bigger, long lifespan trees with bigger long lifespan guards and vice versa – on paper at least.
Initial guard evaluation – sourcing and construction
Option G – the large metal estate guard, failed at the first hurdle. At £354 per guard plus £144 for delivery we didn’t even have enough budget to order them. We could still retrofit them to the trees, which we did plant, if anyone would like to donate a pair or the funds to acquire a pair, as we are interested to look at their functionality in contrast with the others. Currently it looks like we’ll have to make do without.
The first guard to go in the ground was Option J – the ‘Mick special’. Mick himself came and demonstrated their construction. We used:
- 4 posts £6 each, 106mm permapost, 15 year guarantee, 2.4m tall
- 2 half round, 3.6m tantalised rails, £5 each
- Approx 20 round wire nails at 4p each
- 28m of wire for which we used all the random ends left in the shed, which meant the wire was free but we spent £5 on gripples to join it all together
- 92 staples
Essentially the 4 posts go in 2ft, leaving you 6ft which angles outwards from the base. The base and top are braced by frames made from the half rounds and we had 23 rounds of wire in between, starting at a 2 inch spacing and progressing to 3 inches at about half way up.
With the first guard we simply used plain wire but for the second one we thought we’d mix it up a bit and opt for barb, just to see if that made any kind of difference (plus, we used up all of our ends of wire on the first one but we had loads of barb kicking around).
The guards were hard going to put up. You do need two people, not least because the posts going in at an angle is quite tricky, and each guard took the best part of a day to erect, 23 rounds of wire tensioned on 4 posts is a lot of staples. So your materials might be cheap but this was the most expensive guard in terms of man hours.
If we were measuring the guards on ease of construction alone then we’d probably never, ever do these ones again but, that judgement is being withheld until we see how they function (sorry Mick).
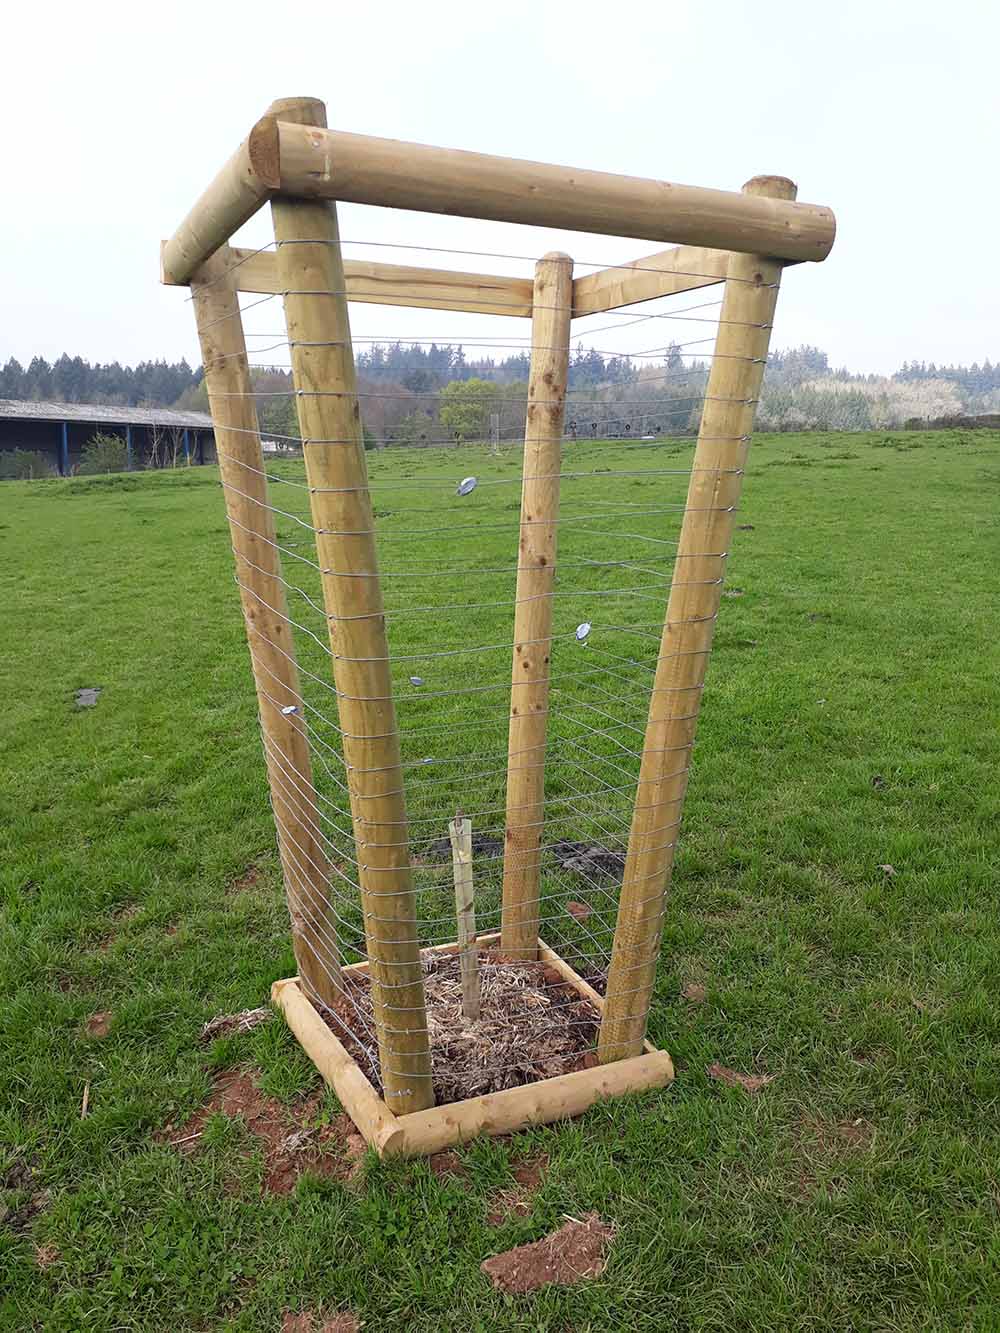
Option J
Next we cracked on with timber options I and K.
Now we cheated a bit here so I would estimate that you could produce two of these a day. They didn’t need two people to put up but it does go quicker. I say we cheated because we used lots of people. The Dartington Conservation volunteers constructed the two option K guards, which is their speciality, and a team from Lifeworks helped construct the option I guards. You could probably get more done in a day with a post rammer but, gluttons for punishment, we continued to do everything by hand.
The option I guards we constructed using
- 4 posts, 106mm permapost 15 year guarantee 2.4m tall, £6 each
- 6 half round, 3.6m tantalised rails £5 each
- Some wooden cross bars which we got out of our scrap wood pile and I suspect came originally from a reasonably solid pallet.
- Approx 56 round wire nails at 4p each
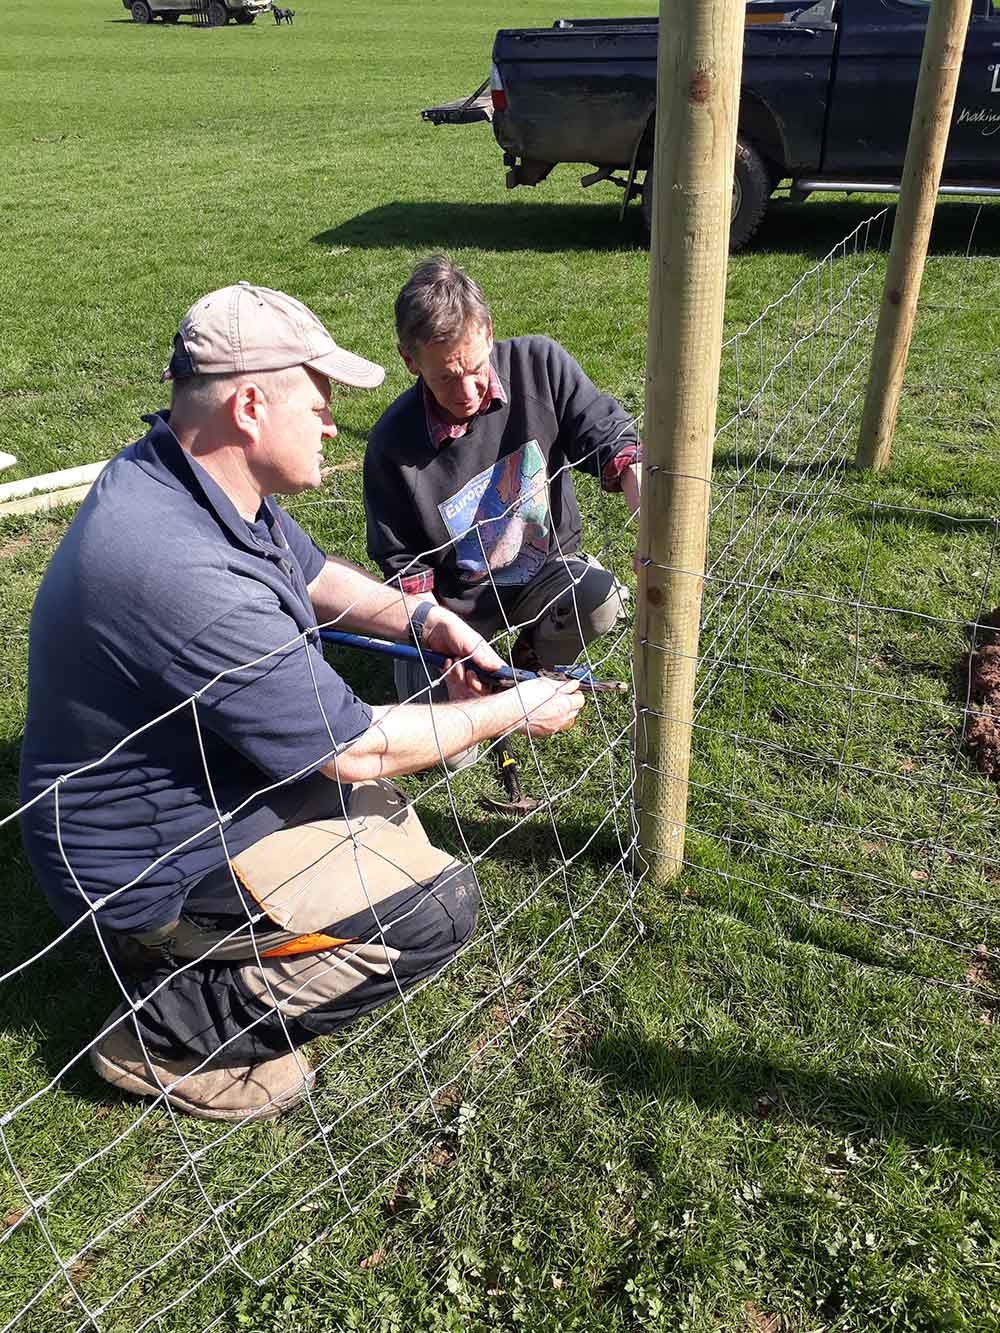
The Conservation team construct Option K
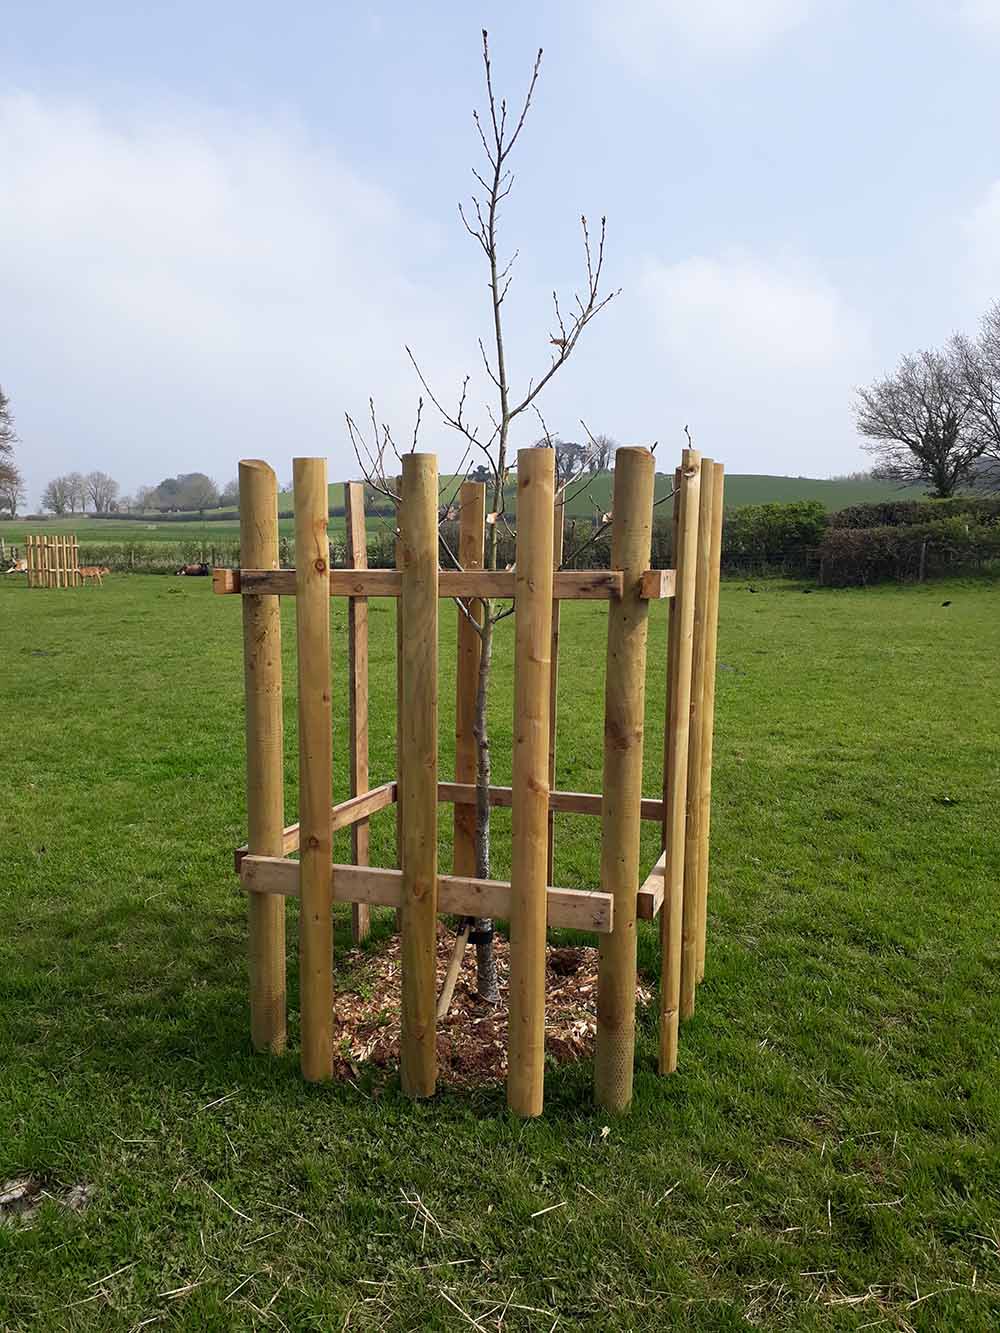
Option I
We made them a metre square between each corner post and put, at least for now, 3 x 6ft half rails on two cross bars. This will definitely make them cow proof but the goats can probably get their heads in – the question is whether they can get their heads in to browse some leaves or can then reach the main trunk of the tree. If it’s the latter we’ll retrofit some more rails. One of our concerns was how easy it would be to attend to the interior of these guards, should one need to. Actually it would be dead easy to knock out a couple of the rails and put them back.
The only weakness of this guard in the construction was that originally we had wanted to pair it with the sycamore tree which is at the top of the field in a windy spot. As well as being a windy spot it’s also a stony spot and it became quickly apparent that we were not going to be able to get a timber post in. Admitting defeat, we did a bit of a switch around so that the option I guard is now on softer ground protecting the Sweet Chestnut and the Hornbeam.
For the option K guards we went with our usual approach of 2m square using:
- 4 posts, 106mm permapost 15 year guarantee 2.4m tall, £6 each
- 4 half round, 3.6m tantalised rails £5 each (you could clearly use shorter ones it’s just that this is what we’d brought for everything else)
- 8m of stock fencing at 84p per metre
- 16m of barbed wire at 17p per metre
- Staples
They’re standard stock netting around 4 posts, topped with a rail, topped with two strands of barb.
Our first metal guard contender to enter the field was Option H, kindly donated by Paddock Fencing who have embraced the spirit of the trial.
When you’ve been faffing around for a couple of days with timber guards, knocking in posts and tensioning wires, metal guards are a revelation. The option H guard came in two halves, with 4 posts and brackets each, plus all the nuts and bolts and even a can of paint for touch-ups!
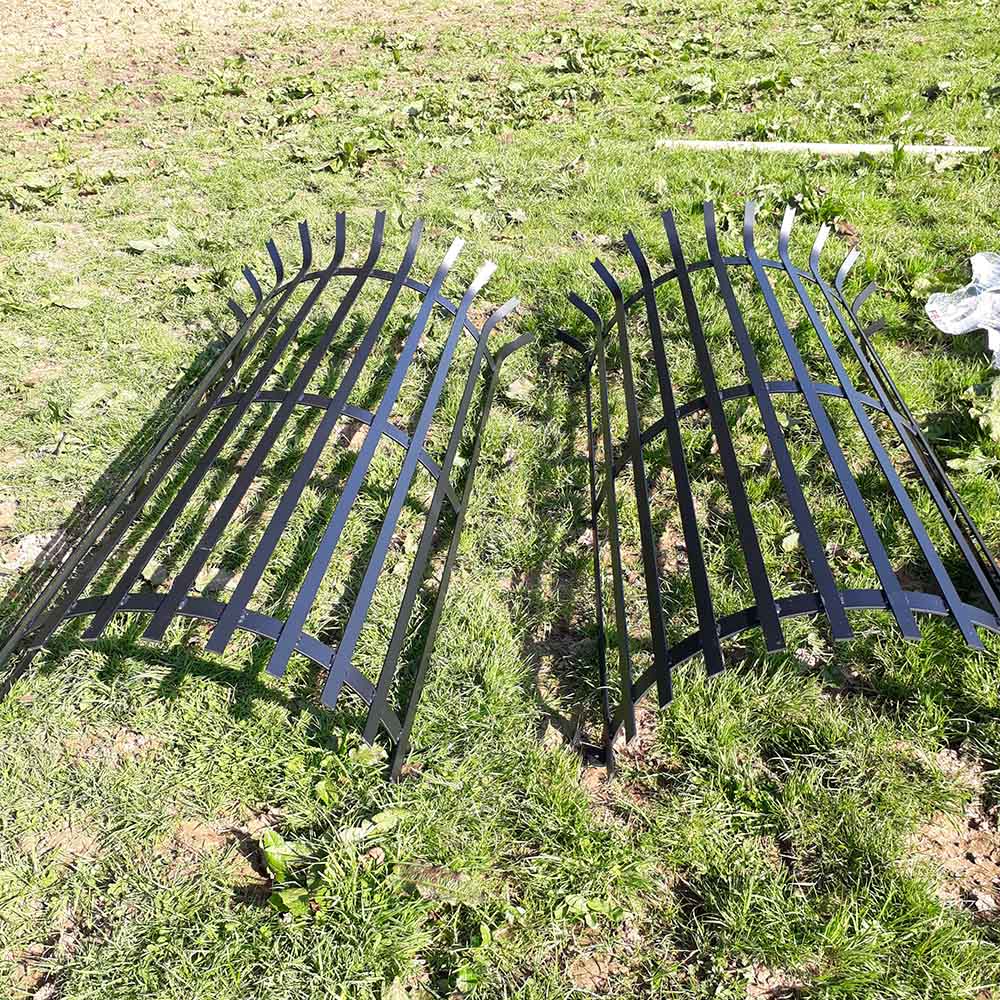
Option H
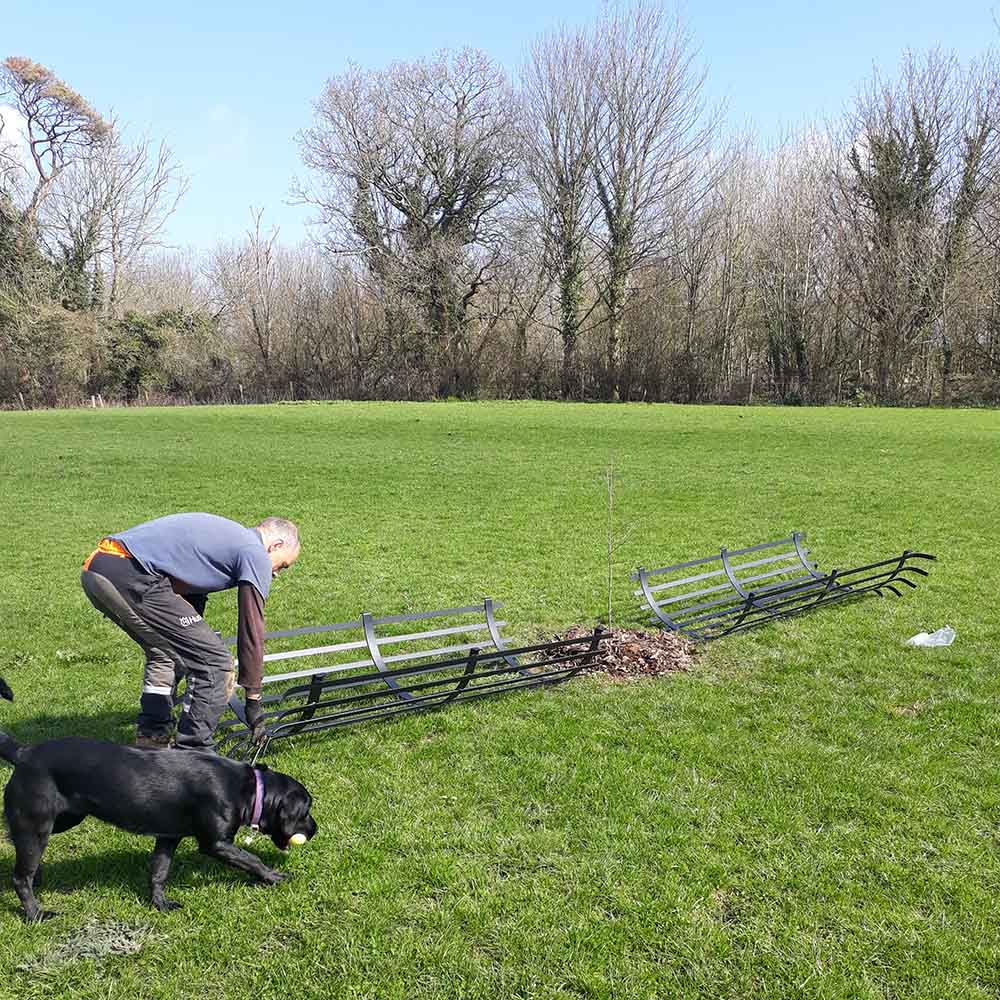
Option H
One XL guard 760mm x 2000mm is £258 plus delivery (the price decreases the more you order, we only needed two).
With the right kit you wouldn’t need more than one person to put it up but otherwise you need two of you to get each half of the guard on/off a vehicle to the tree but from then you’d be fine with just one.
Essentially you just set each half upright, bolt them together around the tree, put the four anchoring posts in at the base and bolt them to the frame using the brackets. The only element which took a bit of finesse was getting the posts in to a point where you could screw the bracket on (which is also what created the most need for the touch up paint). I would also recommend that when your posts are in you back fill them a bit because otherwise, if you accidently drop a nut down the hole they’re not that easy to retrieve. Also, we wondered if people with thick arms might find it a bit challenging to get the brackets on, as you have to be able to get your arms between the bars and around.
It took a couple of hours to put up both guards so whilst you do have a greater materials cost you save a chunk in man hours. It was just so much easier.
The last guards into the Hungry Games for Goats arena were Option F, the Cactus guards. The first shipment to the UK made it through, pre-whatever border situation we may face post Brexit, and immediately upon arrival at Westmorland Woodfuel in Cumbria four were dispatched post-haste to Devon.
The fact there were four of them demonstrates one of their clear strengths which is that at £18.60 per guard (cheaper if you order more) and £22 postage we could afford them (whereas we hadn’t been able to afford the two big estate guards we’d intended to be our third metal guard option). We also acquired an easy tie tool for the fixings at £18.
We brought the 3, 1.5m x 10mm reinforcing bar high tensile steel posts you need to hold them up at a local store. We brought 3m lengths and cut them in half, which means a 1.5m bar works out at £2.23.
We didn’t buy:
- The Rod hammer £30
- The Rod extractor £96
- The guard former/ bender £90
All of which would probably have made things a little easier, certainly if you were doing lots, but we managed without.
We did go through 9 wire ties per guard at 3p a tie.
The sheets arrived flat, 1600 x 1000 x 50mm in size, with a bag of wire ties attached.
These guards are quite tight to the tree so there is a natural tendency to want to bend them on the short edge but you need to bend them on the long edge for the height. They’re super easy, if a bit prickly (one pair of jeans down and several bleeding knuckles), to construct. Even without understanding the words we could easily deduce what was required from the YouTube instructional video (which is in Spanish).
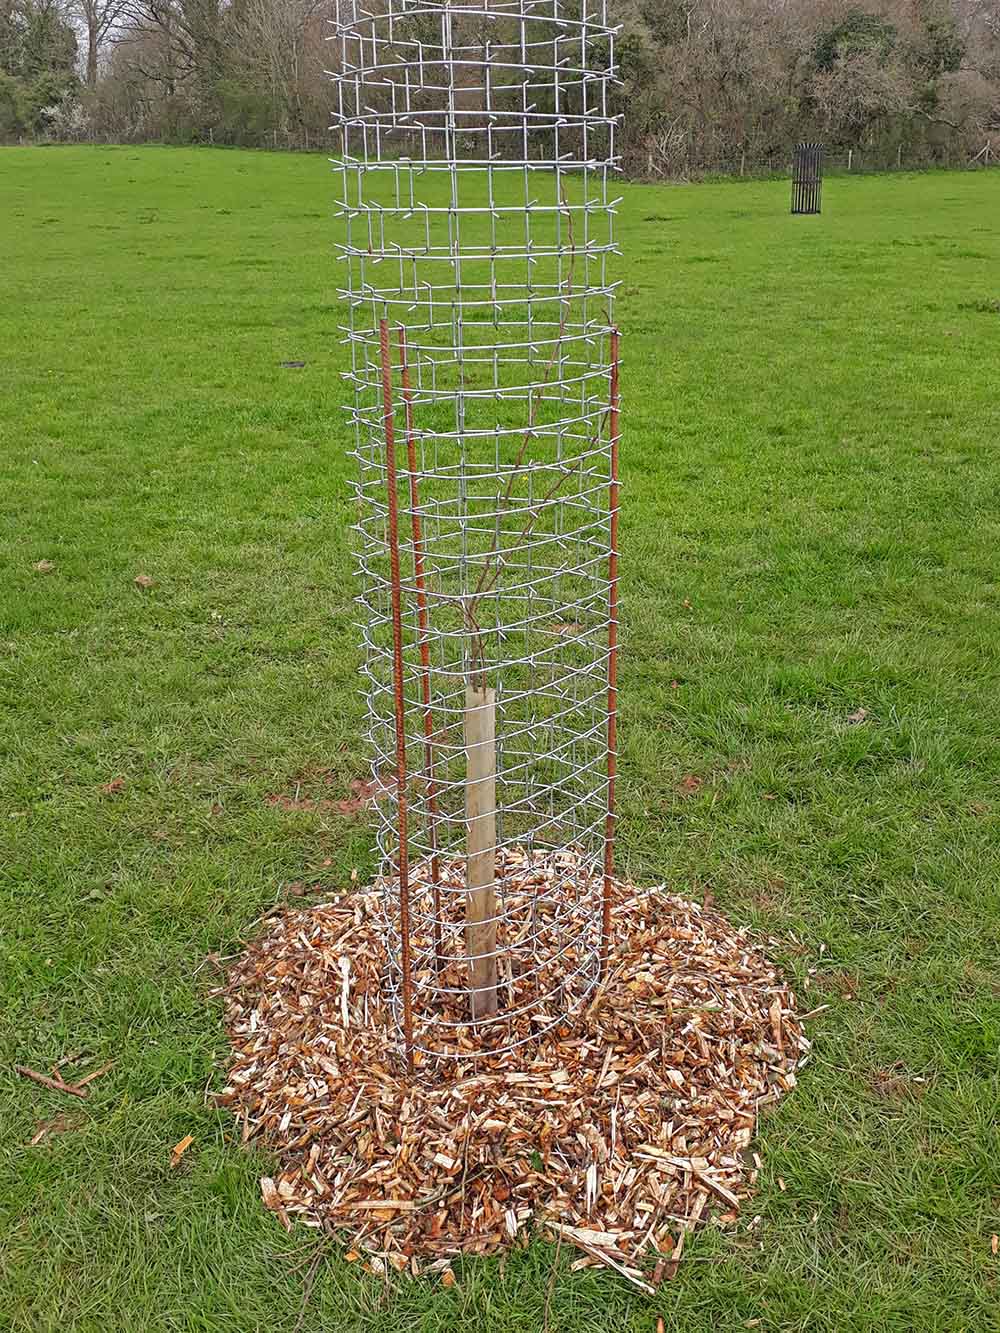
Option F
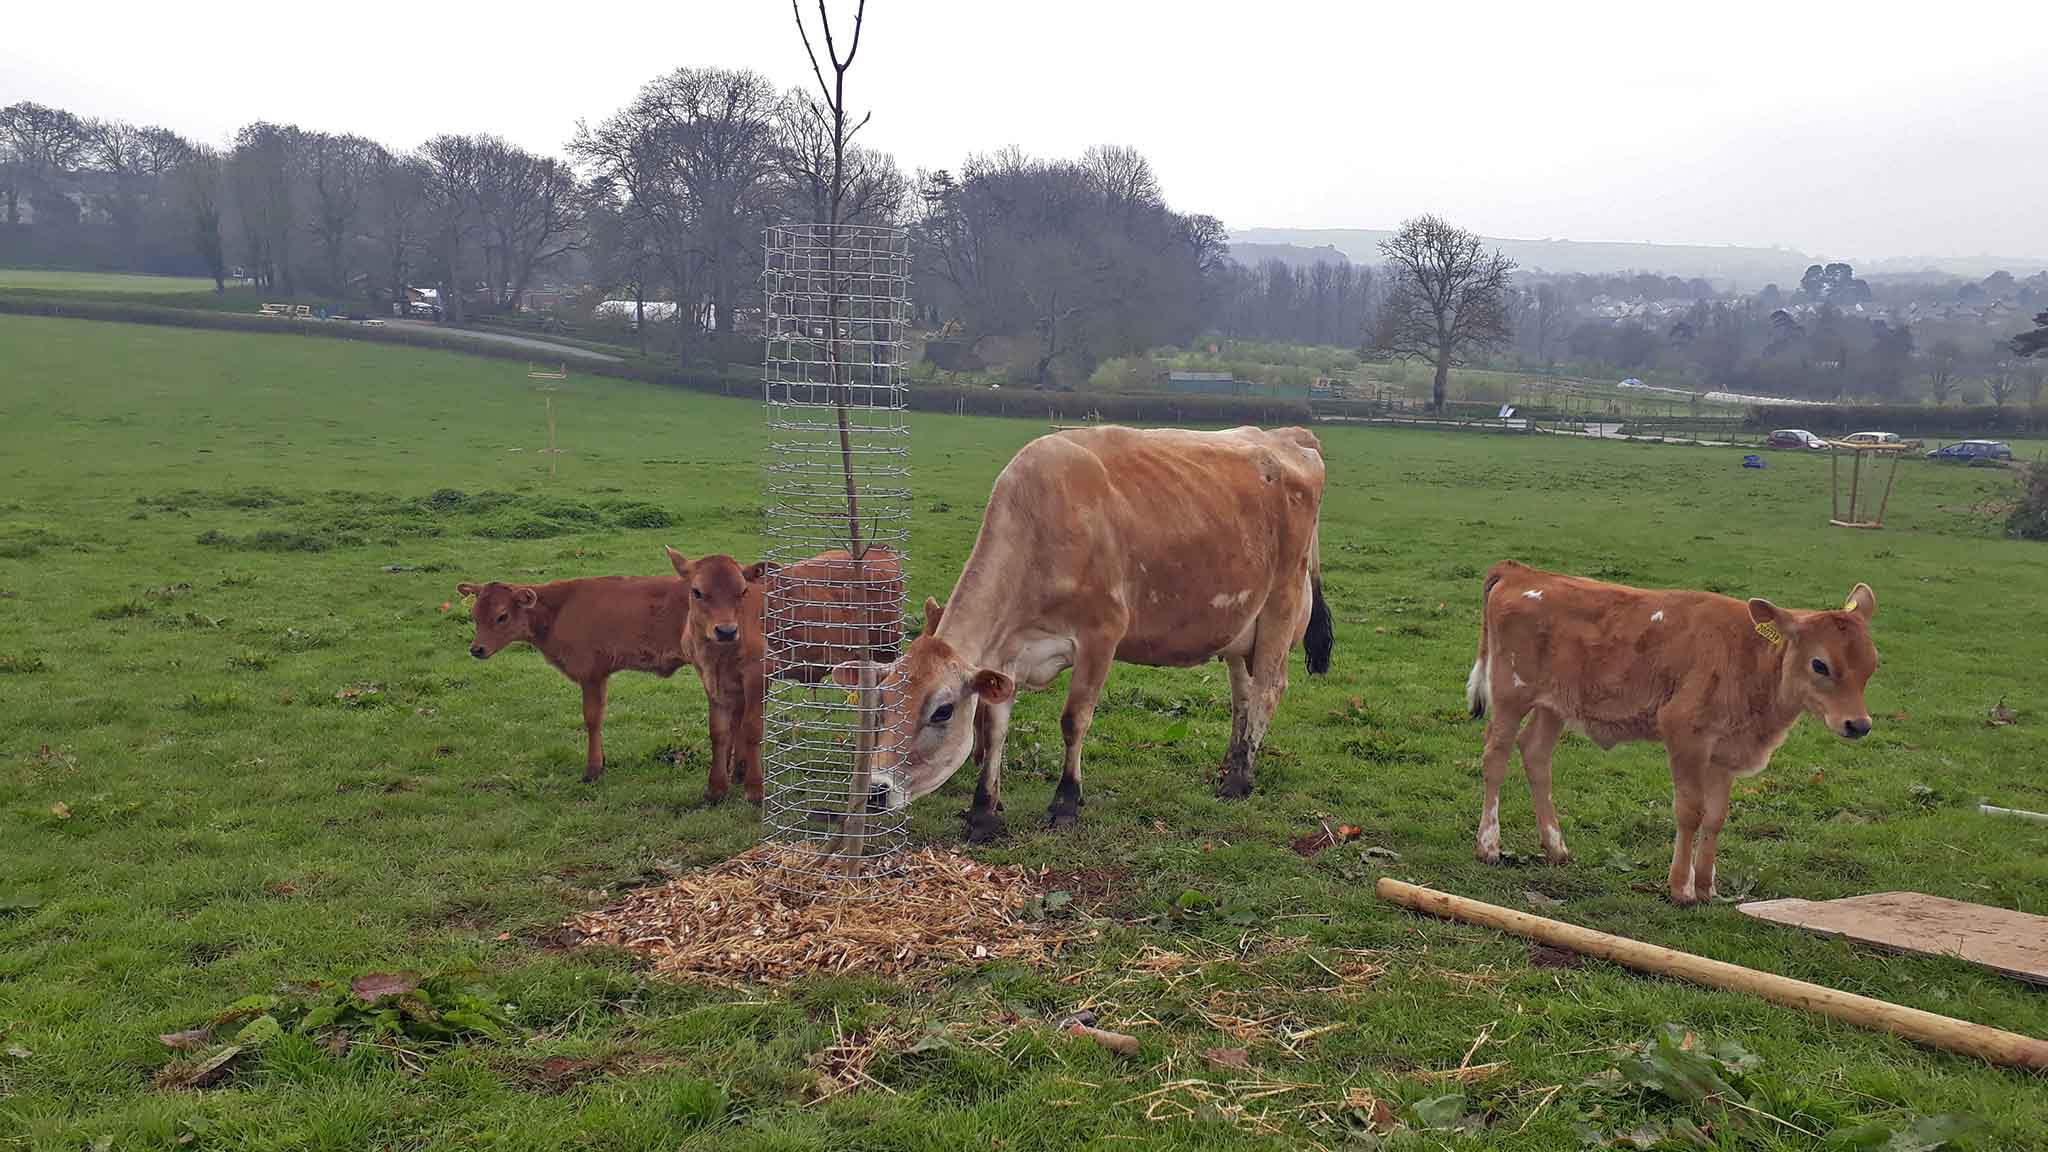
Cows mill around one of our new Option F Cactus Guards on Plum Plot
We used three of the smaller wire tires to secure the edges of the guard together. There’s a bit of a technique to the wire ties: make sure you push the back of the tie hard against the guard whilst you twist the front. Apply a bit of gentle pressure through the drill as you twist and go cautiously on the drill speed, better to twist slowly until you get the knack of it, then you can speed up.
In the end we determined that it was easier to secure the guard in its cylindrical form on the ground and then place it over the tree, if the tree shape permits this.
Once the guard is in position you put the three metal stakes into the ground around it. We were aiming to put them in at a depth of about 50cm but in reality we went in until they felt secure. Another advantage of this guard was the ease of putting the posts in, particularly in stony ground, if you hit a stone it was easy to move the thin rod a little to the right or left to work around it. A little gentle mallet tapping was all it took to secure them.
We did intend to follow Tim’s recommendation of putting some narrow bore plastic pipe sleeves, 60mm gas pipe or 20mm water pipe, around the base of the stakes as apparently they can corrode and form a lump that is impossible to get out when roots form around it. However, it was suggested that as the water would be able to get down the between the plastic and the re-bar this would likely happen at the base anyway and therefore it didn’t seem worthwhile. Will this be a decision we regret in the future?
Having got the three bars in place we then used the larger metal ties to secure the guard to the bars, putting two ties, top and bottom, on each post.
If evaluated on ease of construction alone this guard would win hands down! Affordable and easy for one person to install in under 30 minutes, probably less with practice.
But is it robust enough to withstand the cows and goats whilst still producing a healthy tree? We need your help to find out.
If you’re a Dartington visitor please keep an eye out as you pass Old Parsonage Farm and, if you see the cows and goats interacting with the guards – scratching on them, nibbling around them, trying to get to the trees within them – take a phone pic and tweet, Facebook or Instagram it to us using #HungryGameswithGoats.
Harriet Bell (previously food & farming manager at Dartington Hall)


Hi Harriet,
Just thought I would see how you have got on with the Cactus guards this year? Has tree rubbing on the guard become an issue? Usually the trees recover Ok from some rubbing. The only way I can think of stopping it is to put some heavy duty tape or old inner-tube around the point it rubs on the tree. I haven’t had this issue yet as my trees were smaller to start with and aren’t out of the guard top yet. Did I send a picture of the doubled up guards?
Tim
Hey Tim,
Not as great as I thought if I’m being honest. They’ve all got quite a bit of a lean on them and tree rubbing has been an issue, two of the trees have been ringbarked at the top and lost their crowns due to rubbing.
Trying to think of solutions – your tube idea, also Ella tied hers at the top to either side of the cage to stop the stem going to far from one side to the other.
For the lean don’t know if we should have used 3m metal poles instead of 1.5m or if we should have gone for some thin wooden stakes instead of metal, or if the issue is that the stakes should have gone on the inside of the guard instead of the outside.
Hi Harriet,
Sorry I didn’t see your comment until today. I just want to make some suggestions as to how to avoid the problems of the trees rubbing on the cactus tree guard and causing damage to the leader (growing tip). Firstly the re-bars should definitely be on the inside of the cages. This will reduce the lean on the guards as they are supported on the rods without relying on the metal ties and is intrinsically stronger. I would also consider using 1.2m or 1.5m tree tubes with wooden stakes to guide the tree leaders out of the top of the cages. I think this is less of a problem with tree species with strong leaders such as oak, rowan, alder and more of an issue with trees such as birch which are whippy. I don’t think this is a show stopper for this very effective solution for grazing with trees. Some have also used 2 cactus guards rolled in the short axis to give 2m high guards with 55cm diameter. They have used a 7’ round post and a 5’6” round fencing post inside the cages and then stapled the cages onto the posts. This has been done to meet the specification for option TE8 in Countryside Stewardship and comes in well within budget even with the 2 cactus guards. This should also reduce rubbing due to the trees not growing straight. Rubbing can’t be any worse than on standard weld-mesh guards.
I don’t think you need to use re-bars longer than 1.5m as long as you can get them 50cm into firm ground but it will be site dependant. On very soft ground the re-bars will need to be knocking in further and perhaps 4 re-bars used rather than 3. I don’t think timber posts will be any better on soft ground.
I gather you are no longer at Dartington but please do update your blog with their experience if you can. I feel they will have to re-fix the guards correctly to give them a fair chance. Maintenance is required with all tree guards, none are maintenance-free.
Tim
(UK DISTRIUTOR OF PROTECTOR CACTUS TREE GUARDS)
Super helpful, thanks Tim. The other issue we’ve had a bit with the cactus guards is the trees rubbing on the wire so presumably doubling up would help a lot with that too.
Hi Harriet, loving the update!
Forming the Cactus guards is much easier with the Cactus Bender tool.
I see you put the metal re-bars on the outside of the cage. I did them the other way round. So roughly worked out the distance between the 3 rods and knocked them in with the other tool “rod hammer”. Then slide the formed guard over the top and tie on with the larger wire ties using the “Easytied” power drill tool. I can send you some pics of another way someone has used them which also has merit for tall cows or red deer. 2 guards formed the other way to give a 2m high guard that is 55cm diameter. Two guards needed but they aren’t that expensive compared with the alternative options.
Formed the way you have done them they may need raising up when the tree gets out of the top of there are taller cows or red deer about. A good reason to put a short guard on the tree to stop rabbits and hares on the stem.